Architectural Visualization Production Process
Hey there! We’re the AG CAD Designs team, and we’re excited to take you on a journey through the world of 3D Architectural Visualization Rendering—a transformative technique that’s reshaping the design industry. Whether you’re a homeowner, real estate agent, interior designer, architect, or developer in the USA, this guide is made just for you.
We work closely with you every step of the way, providing personalized service and clear communication throughout the process to ensure your vision comes to life exactly as you imagined. So, let’s dive in and explore this fascinating realm together!
Seamless Remote Collaboration
Access professional millwork shop drawings and 3D architectural visualizations from anywhere—no office visits required. I make the design process smooth, convenient, and fully digital.
Step 1: Personalized Consultation
We’ll discuss your project goals, design ideas, and specific requirements via phone, email, or video call. Your vision is our starting point.
Step 2: Share Your Concepts
Send your construction drawings, CAD files, PDFs, or even hand sketches securely via email or cloud storage.
Step 3: Design Development & Feedback
I create detailed shop drawings or 3D renderings, and we collaborate remotely to refine and perfect the design until it meets your expectations.
Step 4: Final Digital Delivery
Receive your finalized drawings or renderings in the format you need—ready for construction, fabrication, or presentation.
How to Get Started
Starting your project is simple and stress-free:
Reach Out: Schedule an initial consultation via phone, email, or my website.
Provide Project Details: Share your construction plans or concepts digitally.
Collaborate & Review: Work closely to refine the designs remotely.
Receive Deliverables: Get your final drawings or 3D visualizations digitally, ready for implementation.
With precision, quality, and client satisfaction as priorities, I bring your project from concept to reality, whether it’s detailed millwork or immersive 3D architectural visualization.
Why 3D Architectural Visualization Matters
Homeowners: Experience a realistic preview of your future home, helping you make confident design decisions.
Real Estate Agents: Highlight properties with stunning visuals that attract buyers and accelerate sales.
Interior Designers: Experiment with layouts, materials, and textures virtually, avoiding costly mistakes.
Architects: Communicate design concepts clearly and streamline client approvals.
Developers: Impress stakeholders, attract investors, and guide construction teams efficiently—saving time and reducing costs.
Key Benefits of Professional 3D Architectural Visualization
1. Expertise You Can Trust
Skilled professionals bring years of experience and in-depth knowledge of the latest 3D software, ensuring your project is visualized to perfection.
2. Save Time and Effort
Outsourcing the visualization process frees you to focus on other important aspects of your project, streamlining workflow and efficiency.
3. Fully Customized Designs
Professional services deliver tailor-made visualizations that reflect your unique vision, style, and project requirements.
4. Stunning, High-Quality Output
Using advanced techniques and cutting-edge software, experts produce photorealistic visuals that truly bring your design ideas to life.
3D Architectural Visualization Rendering Process: A Step-by-Step Guide
Creating high-quality 3D architectural visualizations involves a systematic workflow to bring designs to life. Here are the main steps:
1. Data Collection & Preparation
Gather all project details, including floor plans, elevations, reference images, and design concepts. Organizing this data ensures accuracy in the visualization process.
2. 3D Modeling
Build a detailed 3D model of the architectural design, including structural elements, interiors, and key features. Precision at this stage lays the foundation for realistic visuals.
3. Materials & Texturing
Apply appropriate materials, finishes, and textures to the 3D model. This step enhances realism by simulating real-world surfaces and materials.
4. Lighting Setup
Set up lighting to mimic natural or artificial light sources, creating depth, shadows, and atmosphere for a realistic and visually appealing result.
5. Camera Setup & Composition
Position virtual cameras and adjust angles to showcase the design from the most compelling perspectives, ensuring an engaging visual narrative.
6. Rendering
Generate high-resolution images or animations using advanced rendering techniques. This step transforms the 3D model into photorealistic visuals.
7. Post-Processing
Enhance the rendered images with color correction, effects, and final touches to achieve a polished, professional presentation ready for clients or marketing purposes.
Step 1: Gathering Design Information & Understanding Your 3D Vision
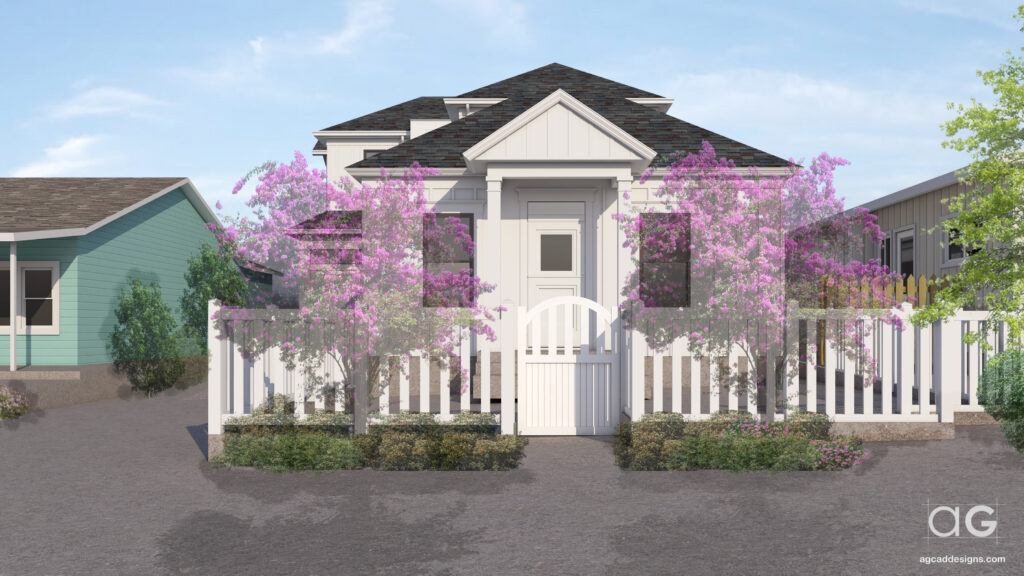
The first step in our 3D architectural visualization process is to gather all relevant project information and fully understand your design goals. We work closely with you to capture your vision for both exterior and interior spaces, including materials, finishes, and the level of detail you want in the final renderings.
We review any existing architectural plans, drawings, and specifications to ensure a complete understanding of your project requirements from the very beginning.
What We Need From You
To provide an accurate quote and start the project smoothly, please share the following:
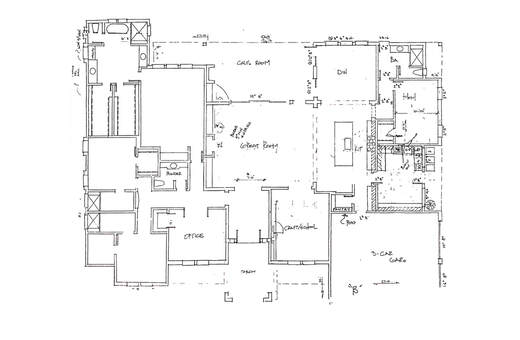
Architectural Plans: Floor Plans, Roof Plans, Elevations, Sections, and Site Plans in PDF or AutoCAD DWG format.
Preferred Camera Angles: Indicate the views you’d like to see in the final renderings, which can be marked directly on the floor plan.
Reference Images: Examples for staging style, interior design, lighting, colors, and materials. Existing site photos are also helpful.
3D Model Files (if available): SketchUp, Revit, Home Designer, ArchiCAD, or Chief Architect files.
Additional Details:
Will you want people, pets, or cars included in the renderings?
Interior Finishes, including Furniture, Fixtures, and Equipment (FFE) schedules.
Lighting design information for interiors and exteriors.
Inspiration images from platforms like Houzz or Pinterest.

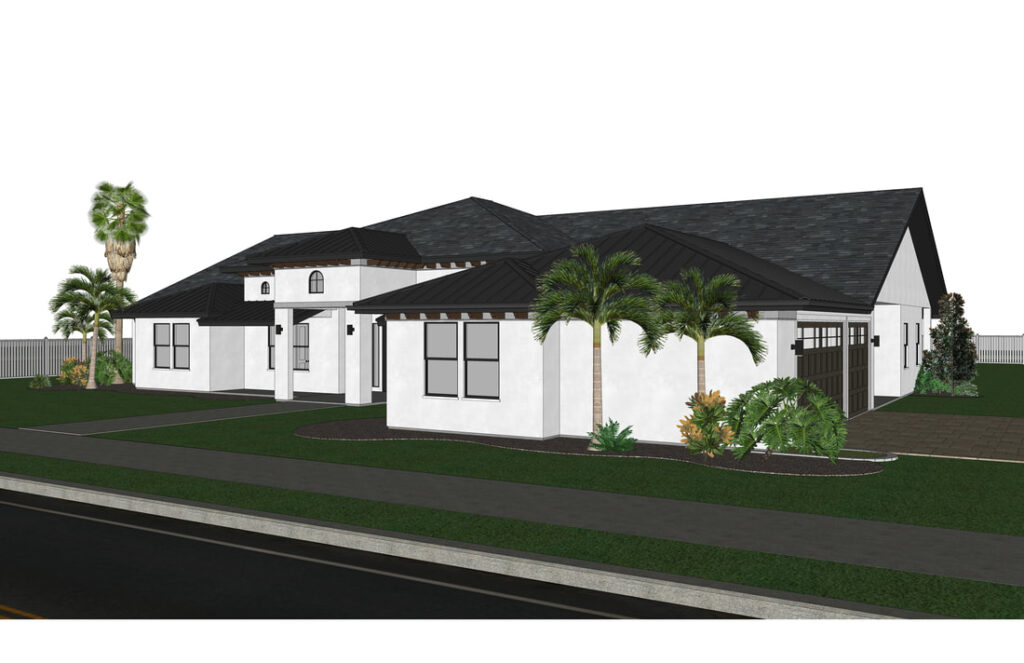
Step 2: Creating the 3D Exterior or Interior Model
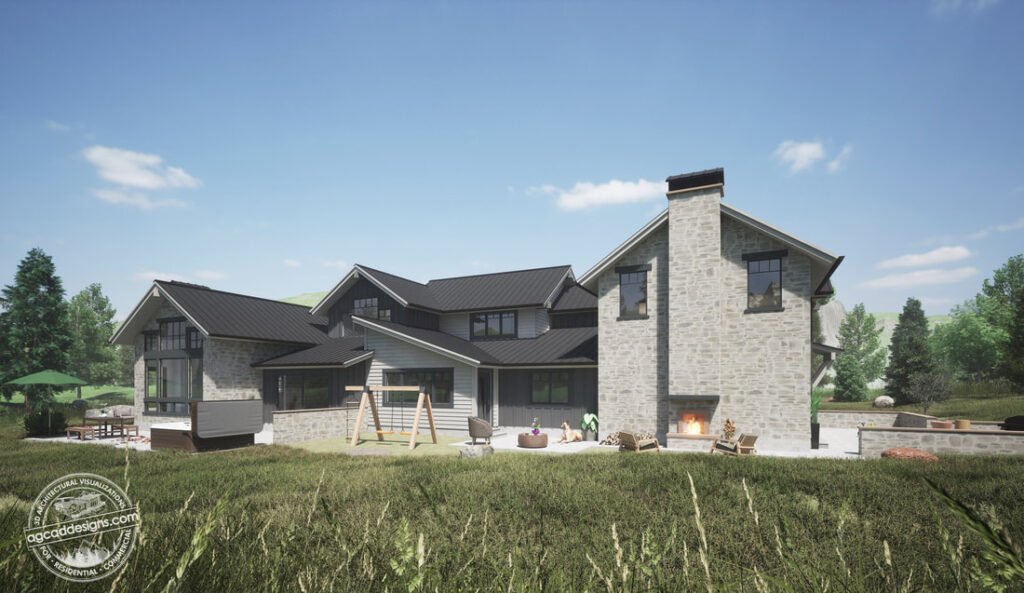
Once we fully understand your project requirements, we begin building a detailed 3D model of your structure—whether exterior or interior—using advanced 3D CAD software.
Accurate Modeling: We import your plans and drawings and construct a 3D model that accurately reflects the proposed design, ensuring correct scale, proportions, and structural details.
Materials & Textures: Surfaces are assigned realistic materials such as wood, concrete, metal, bricks, tiles, and roofing finishes to bring the model to life.
Lighting Setup: Both natural and artificial lighting are simulated to create a realistic atmosphere, taking into account sun position, time of day, and interior lighting.
This step forms the foundation for creating photorealistic visuals that faithfully represent your vision.
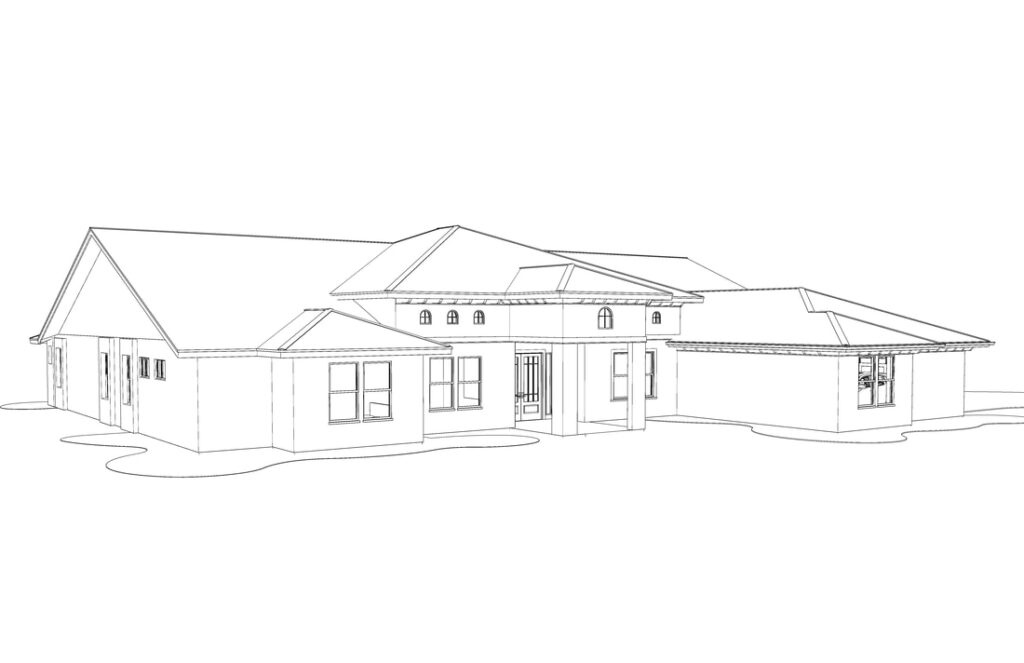
Step 3: Rendering & Architectural Post-Production
After the 3D model is ready, we produce preliminary renderings and share black-and-white previews for your review.
Feedback & Revisions: You can provide notes, indicate preferred camera angles, and suggest minor adjustments. The quoted price includes two rounds of revisions. Clear feedback—such as red lines or video calls—is crucial for efficiency.
Additional Changes: Any major changes beyond the initial scope, or revisions after the first two rounds, may incur additional fees.
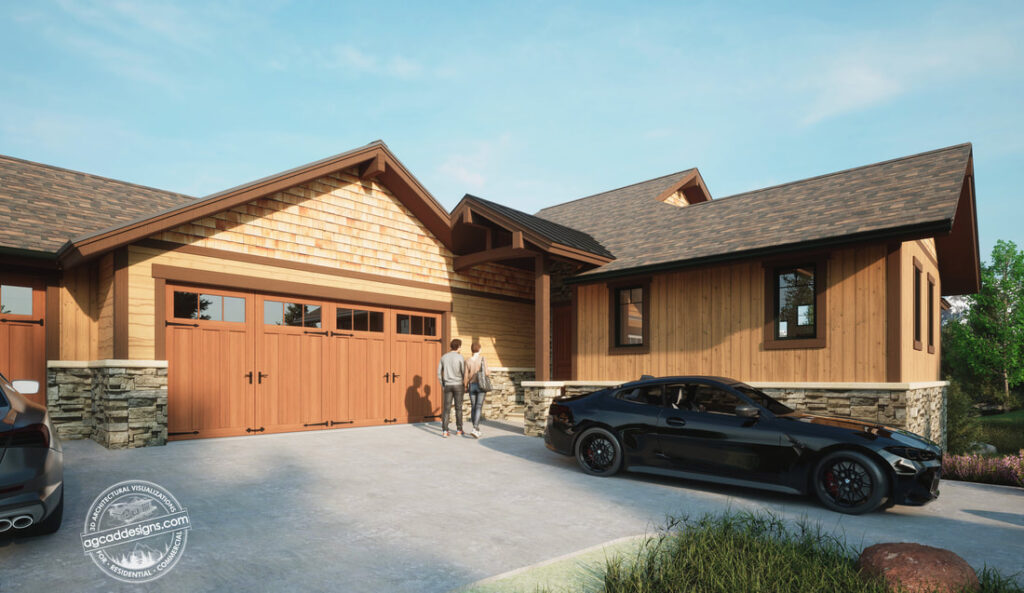
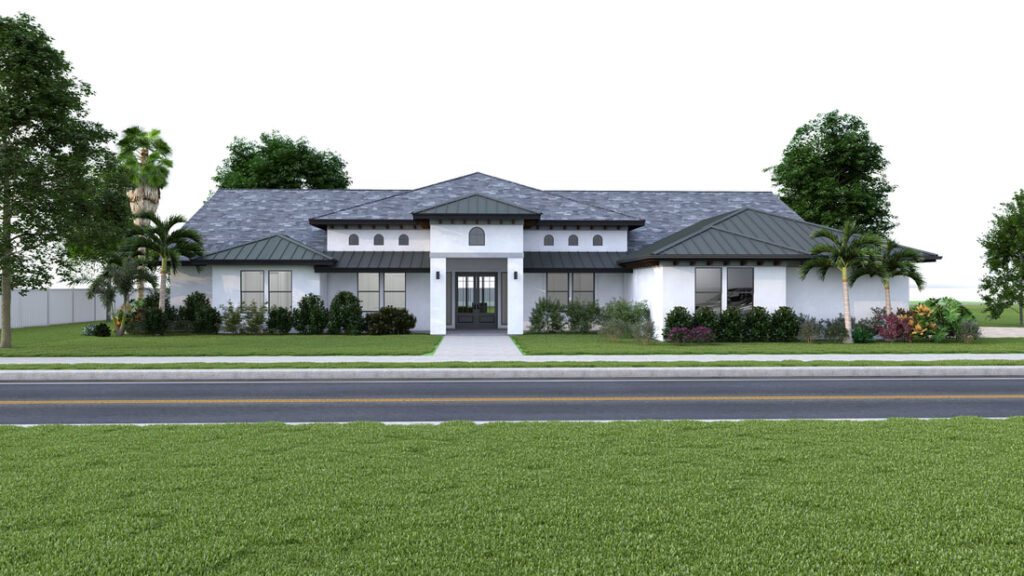
Final Rendering & Post-Production: Once approved, the images are fully rendered. We enhance them through post-production—adjusting brightness, contrast, and saturation, refining composition, and adding elements like people, cars, or landscaping to create a realistic and visually appealing scene.
This phase ensures the renderings are professional, polished, and ready for presentation or marketing purposes.
Step 4: Client Final Review & Approval
The final step is your review and final revisions.
Client Feedback: You review the completed renderings and request any minor adjustments to ensure the images perfectly reflect your vision.
Collaboration: We work closely with you to incorporate feedback while maintaining the integrity of the original design.
Scope Considerations: Significant changes to the original design after finalization are considered major revisions and may affect the timeline and cost.
Project Completion & Final Delivery
Once all revisions are approved, the remaining 50% payment will be due before the final handover. After receiving the payment, the project will be officially marked as complete, and the final 3D architectural renderings will be delivered to the client. Deliverables may include high-resolution still images or an animated flythrough, depending on the agreed scope. We also provide necessary file formats to ensure smooth integration into the client’s marketing materials or presentations.
All watermarks will be removed from the final deliverables upon confirmation of the pending payment. The project will be considered fully completed once the final CAD drafting drawings or 3D renderings are shared via email in high-resolution PDF or JPEG format.
If additional changes are requested later—such as new camera angles or design modifications—they will be charged separately on an hourly basis.
Accepted Payment Methods:
We accept most credit cards, wire transfers, and PayPal for client convenience.
3D Architectural Visualization Rendering Services – FAQs
Everything You Need to Know Before Getting Started
If you’re considering 3D architectural visualization rendering services, chances are you have a lot of questions. That’s why we’ve created this comprehensive FAQ guide to answer the most common queries and give you a clear understanding of how the process works.
At AG CAD Designs, we specialize in delivering high-quality 3D renderings for clients across the USA, Canada, Europe, and beyond. With years of experience and a team of expert designers, we’re here to turn your vision into photorealistic visuals that inspire and impress.
1) What is 3D Architectural Visualization Rendering?
It’s a digital process that transforms architectural plans into realistic 3D visuals. Using advanced software, we model your building or space, apply textures, materials, lighting, and shadows, and produce lifelike renderings. The result is a photorealistic image or animation that helps you and your clients visualize the finished project with clarity.
2) What Are the Benefits of 3D Architectural Visualization?
Some key benefits include:
Accurate, detailed representations of projects
Better communication between clients, architects, and designers
Early detection of design issues before construction
Reduced costs and project delays
Powerful marketing and promotional material for real estate developers
Increased chances of client approval and faster decision-making
3) What Types of Projects Can Benefit?
3D visualization is widely used for:
Residential & Commercial Buildings
Interior Design & Renovations
Landscape & Urban Planning
Industrial & Infrastructure Projects
Historic Restoration
Furniture & Product Design
4) How Long Does a Rendering Take?
The timeline depends on complexity.
Basic rendering: a few hours to 2 days
Detailed, high-end project: several days to weeks
Factors include project size, revisions, and level of realism required.
5) What Is the Process?
Our streamlined process includes:
Initial Consultation – Understanding project scope & requirements
Data Collection – Site images, CAD drawings, or sketches
3D Modeling & Rendering – Creating lifelike visuals
Client Review & Feedback – Ensuring your vision is captured
Final Delivery – High-resolution images, animations, or walkthroughs
6) What Software Do You Use?
We use industry-leading tools such as:
Autodesk 3ds Max
SketchUp
Rhino 3D
Lumion
Chaos V-Ray
Twinmotion
Unreal Engine
7) What Affects the Cost of 3D Rendering?
Pricing depends on:
Project size & complexity
Level of detail & realism
Type of output (still image, animation, VR tour)
Number of revisions
Timeline & urgency
👉 A small residential project may cost a few hundred dollars, while a complex commercial or high-detail project may cost several thousand.
8) How Can I Ensure Quality Results?
Work with an experienced studio with a strong portfolio (like AG CAD Designs)
Provide clear project requirements & references
Give structured feedback during revisions
Collaborate closely with the rendering team
9) How Do I Get Started?
Getting started is simple:
Contact us at agcaddesign@gmail.com or via our website
Share project details, drawings, or inspiration images
We’ll schedule a consultation (Zoom, Google Meet, FaceTime, etc.)
You’ll receive a project quote and timeline tailored to your needs
10) How Can 3D Visualization Help with Marketing?
3D renderings are powerful tools for presentations, websites, brochures, and social media campaigns. They:
Showcase projects in a visually stunning way
Attract investors & buyers faster
Help clients make informed decisions
Differentiate you from competitors
Online 3D Visualization – Additional Services
Not sure where to start? We also offer Preliminary 3D Rendering Consultations to help you visualize your design concepts.
Share room measurements, site photos, or inspiration images
We’ll prepare preliminary CAD floor plans & 3D layouts
Walk through your proposed design virtually via a 3D file
Explore materials, furniture layouts, lighting, and finishes before construction
This service is perfect for homeowners, architects, and developers who want a clear design direction before committing to final drawings.